
20 Oct Tutorial: Adding bleed to your artwork
One question we get asked a lot as a print company is ‘What is “Bleed” and why do you need it?
Simply put, when you see business cards and leaflets with images or colour going right to the edge of the document (see image above) these have had some extra image (usually around 3mm) added onto each edge during the design process.
By doing this, we are giving the print finishers some leeway for when they are cutting the document down to the correct size. If we didn’t have the bleed added, you could end up with some white paper showing if the guillotine shifts a little throughout the finishing process and doesn’t quite hit the edge of the artwork correctly.
Adding bleed in InDesign
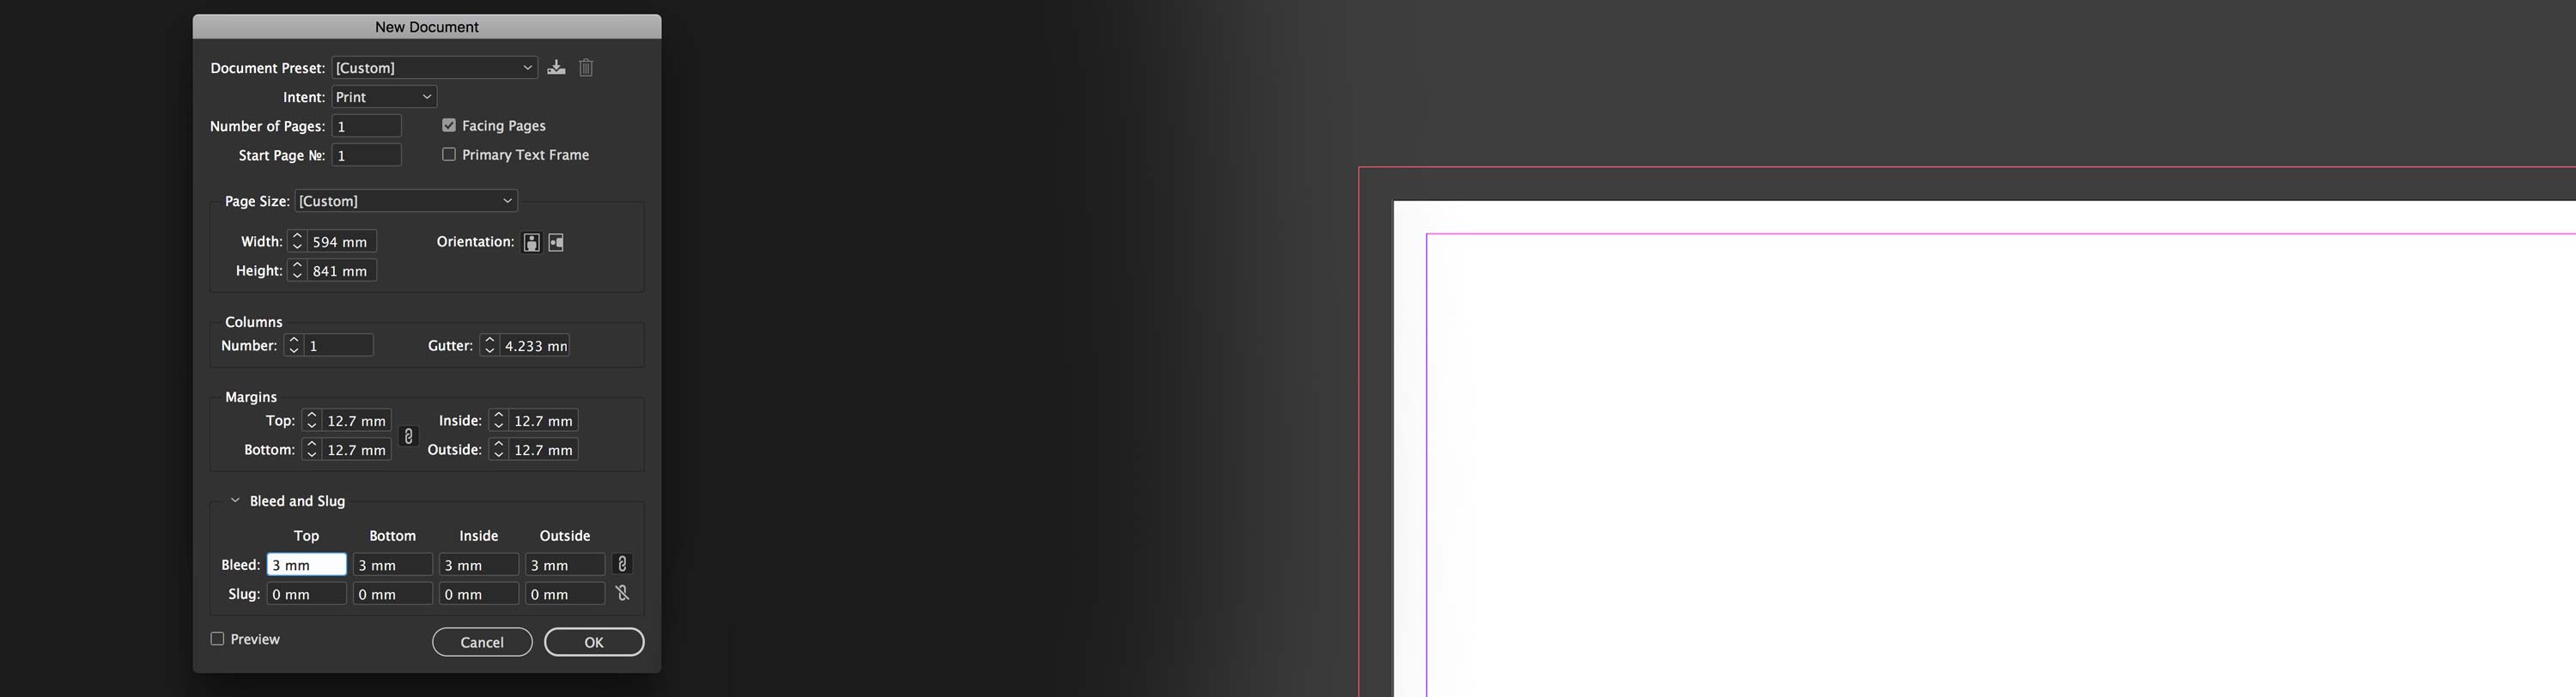
When setting up your document, in the document set up panel at the bottom, there will be a bleed section. Simply enter your bleed in whatever unit of measurement you are using, and pat yourself on the back, you just added bleed to your document!
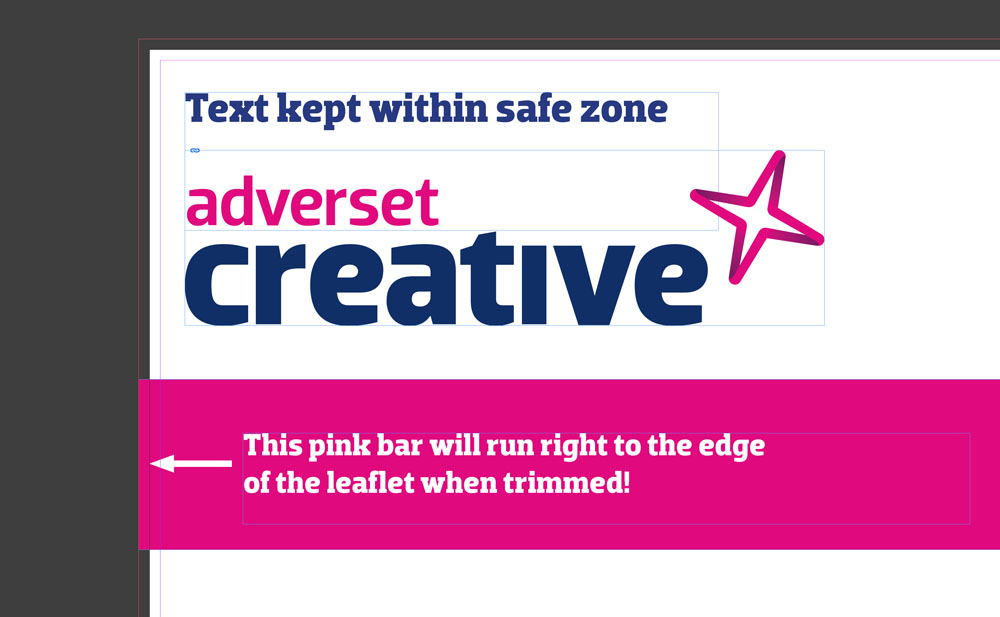
When creating your design, make sure anything you want going to the edge of the print extends into this and up to the bleed line – see the pink bar in the screenshot below.
Pro tip:
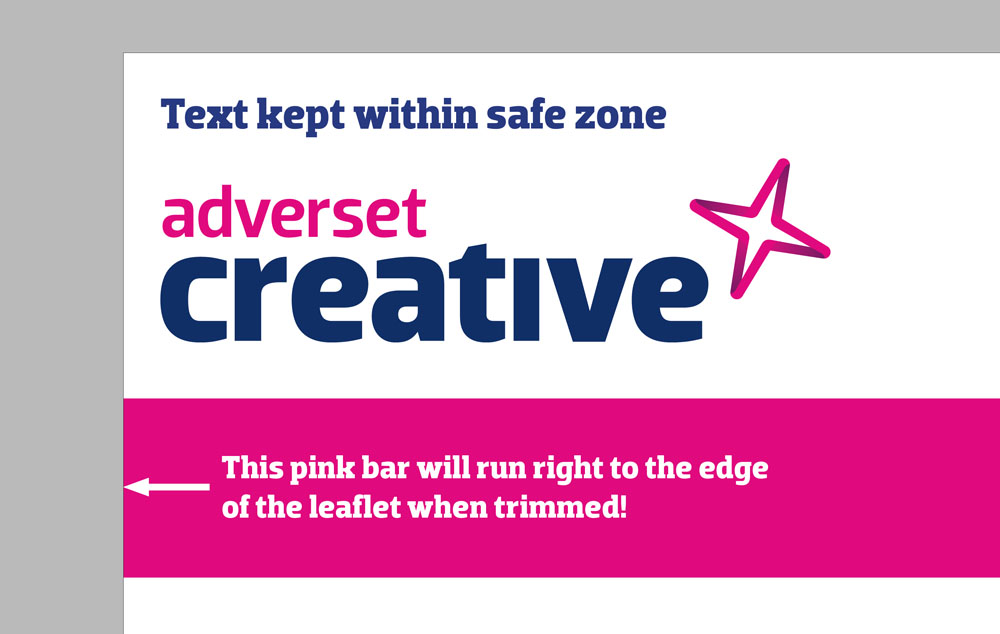
Press ‘W’ on your keyboard during design to get a preview of the document with the bleed section cut off (see below)
Adding bleed in Photoshop
Now, this is where it gets slightly more confusing… Bleed isn’t an option when setting up Photoshop documents, so you have to add the total bleed when setting up the document size. So for example, if you want to add 3mm bleed on both the height and width, you need to double it and add it to the dimension. (e.g. for 3mm bleed, you’d have to add 6mm to the height and 6mm to the width of the document)
Then to get a visual representation of where the bleed is – we need to set up a new set of ‘Guides’ – do this by clicking View > New Guide Layout…
In this dialogue box, enter your bleed amount into the ‘margins’ box, so, for example, 3mm would be 3mm in each box.
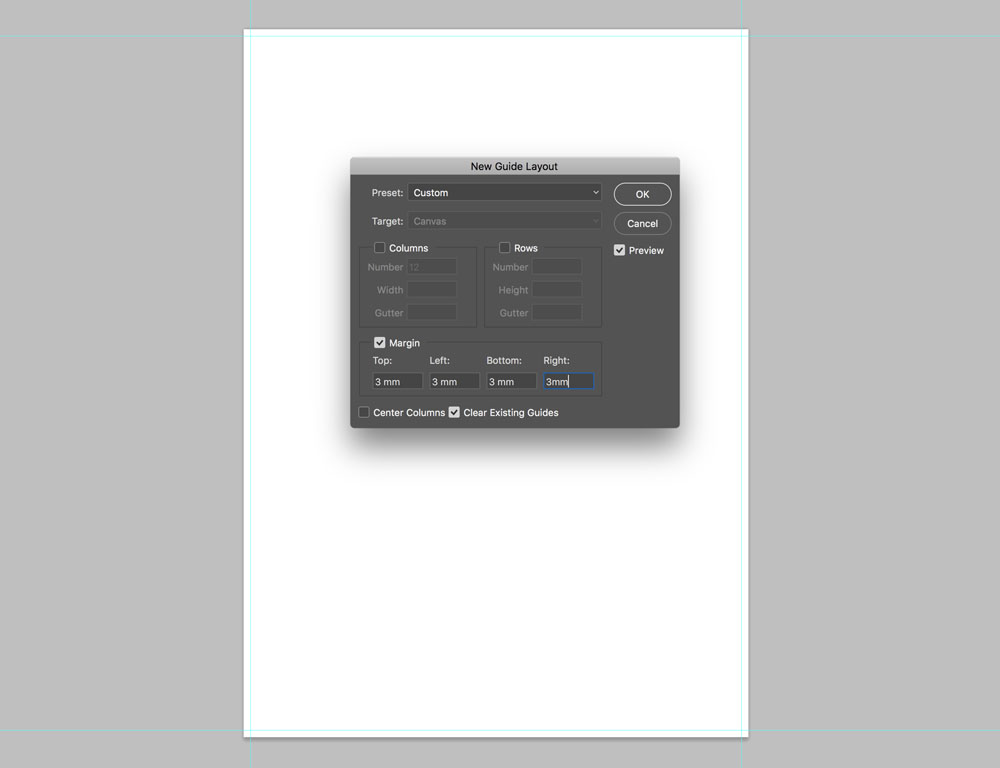
Click OK and get designing – your Photoshop document now has bleed!
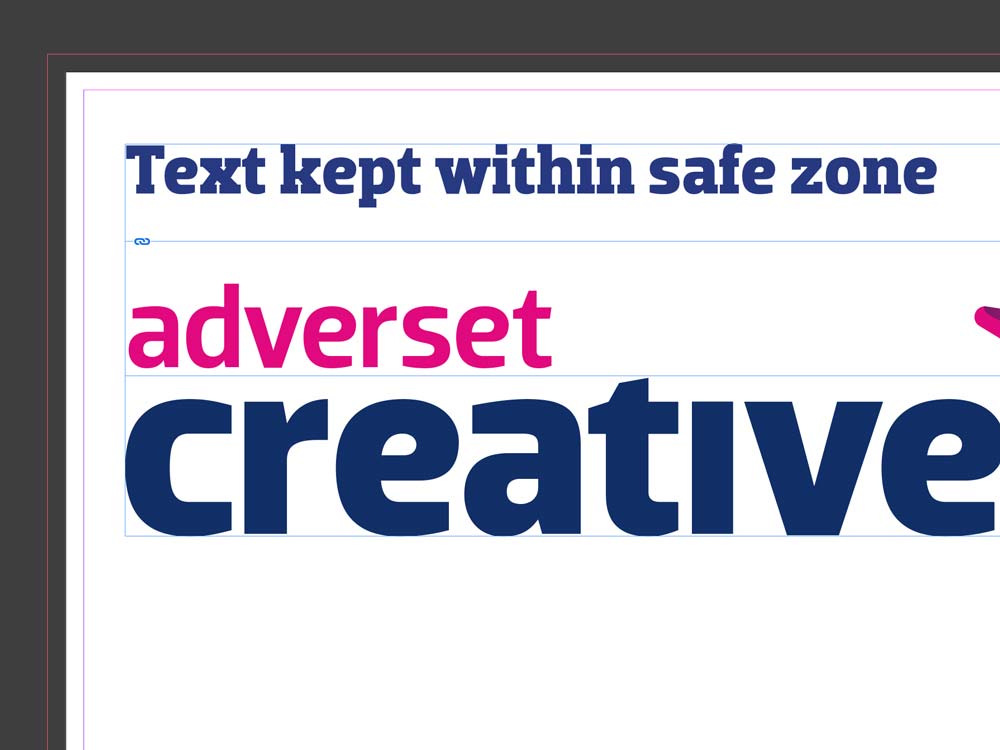
The Safe Zone
This is usually the same size as the bleed, but inside the ‘cut line’ (see diagram below) This is here for the same reason as the extra bleed – and gives another 3mm for example in case the guillotine moves inwards the other way.
The safe zone is so called because it’s an area that shouldn’t ever be touched by the guillotine – so any text placed within the confines of the document side of the safe zone will be safe from being cut off!
Exporting your files with bleed
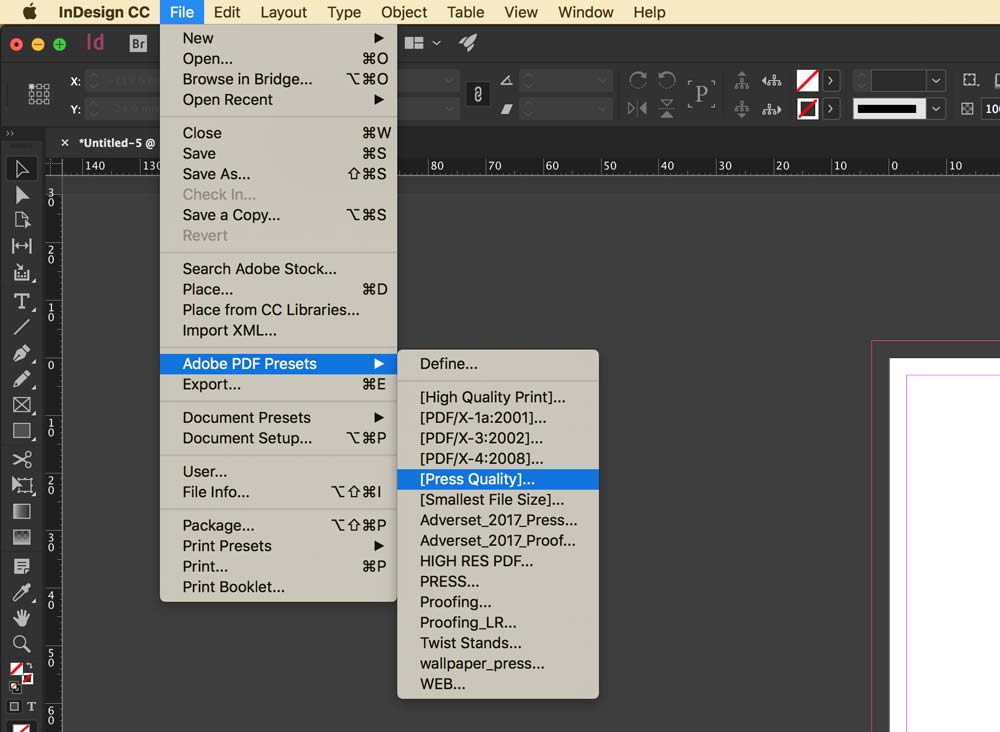
Once your artwork is complete, you then need to export your artwork as a print ready file – in InDesign, you need to create a PDF, you do this by clicking File > Adobe PDF Presets > [Press Quality]…
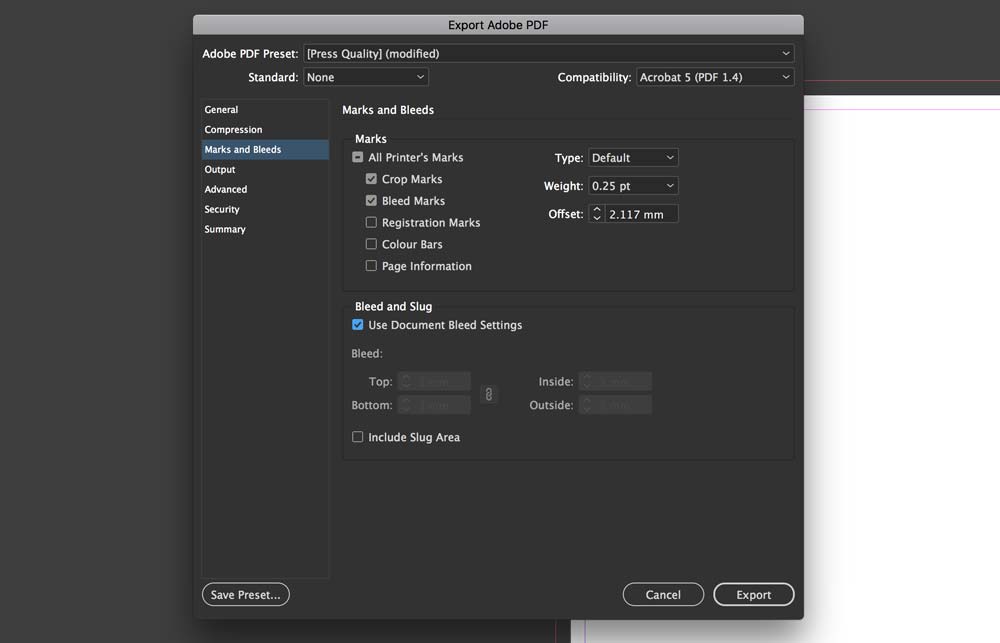
Choose a filename for your document, we like to suffix our filenames with the word ‘_PRESS’ to minimise confusion when submitting the correct file to print. Once you’ve chosen the location to save to, the next stage is to set your PDF settings.
I won’t go into the full settings of a PDF, as that’s another blog post! but to make sure your bleed is apparent on your print ready pdf, you will need to click the Marks and Bleeds tab, select Crop Marks, and Bleed Marks and then tick the box underneath – Use Document Bleed Settings. Then when you output your PDF, the marks will be there to guide the print finisher through the process.
If you have any further questions about bleed or how to set it up, please leave a comment below and we will get back to you, alternatively, you can contact us and we will send you a template for any of our products you require printing.
Sorry, the comment form is closed at this time.